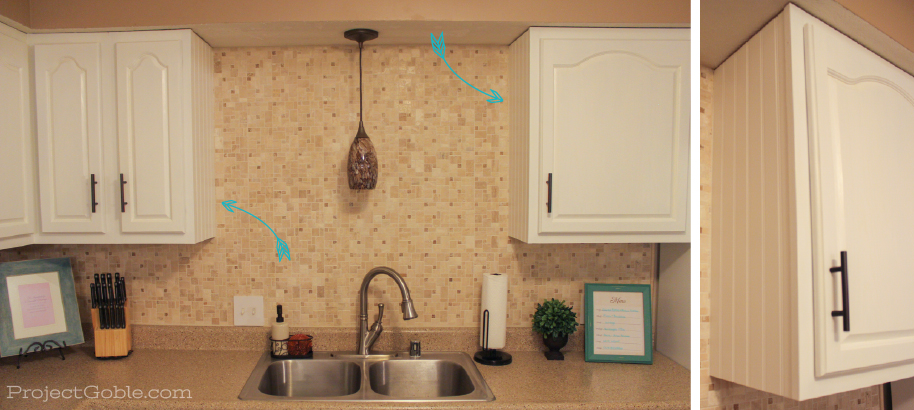
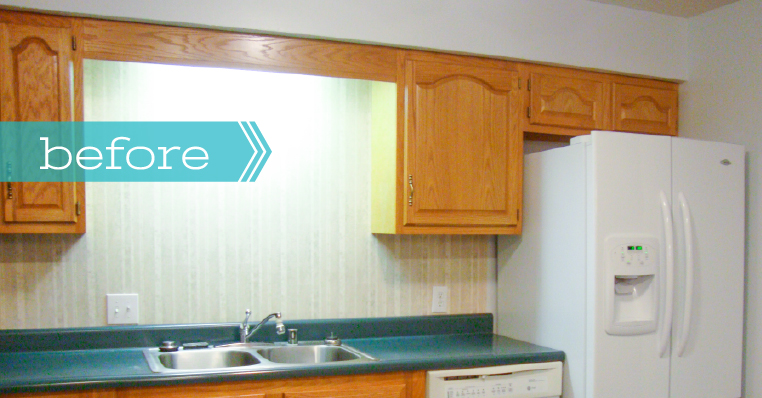
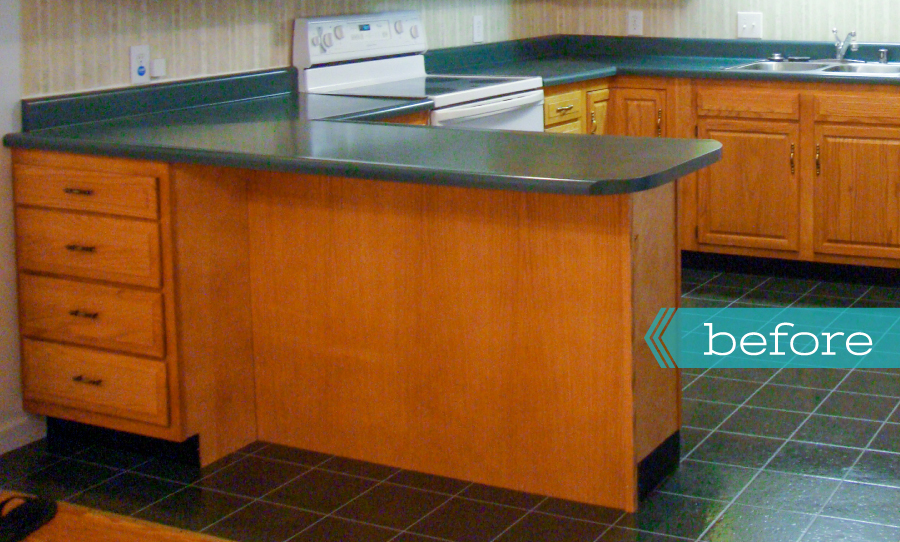
As we were getting all of our ideas together for the kitchen makeover, we thought about dressing up the ends of our cabinets and the large section under our peninsula/bar. These areas were just plain wood and lacked any type of shape or moldings and just did absolutely nothing for us. We quickly thought beadboard, it would give it a different look without being too overbearing. Although we didn’t want it to stick out and be the first thing you notice when you walk into the room, but rather just a simple detail that would give those areas a more finished (and custom) look.
 We purchased beadboard paneling that was primed and ready for paint. For us, the painting part consisted of using The Rust-Oleum Cabinet Transformation base coat so the final result would match up perfectly with our cabinets. I carefully measured the pieces we needed and cut them with a circular saw using a straight edge so I’d make sure to get a good straight cut. (If you have a table saw, that will work too!)
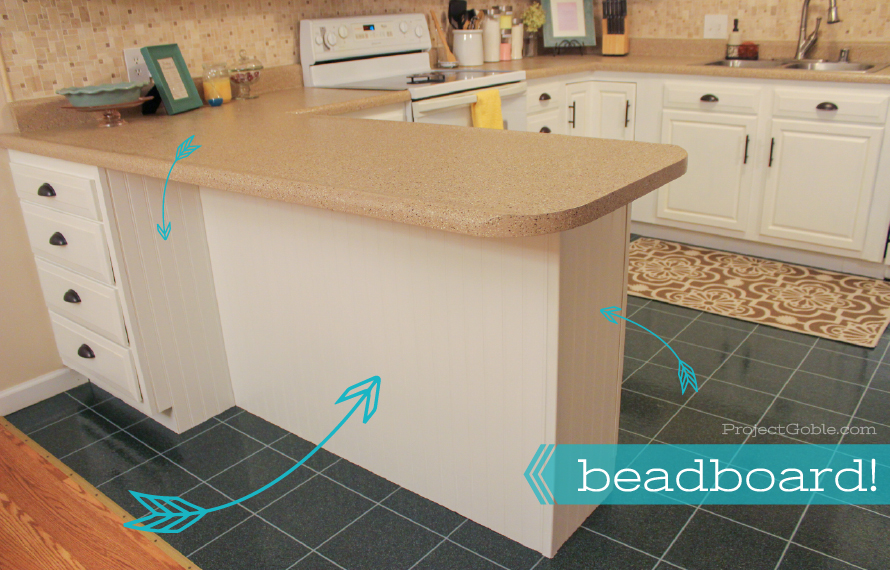 Putting up the beadboard wasn’t too difficult either (we TRY not to get ourselves in over our heads). I used some Loctite construction adhesive and secured it in place with my handy dandy pin nailer, which is great for finishing work, as the tiny pins barely even leave a hole where you put them. You can even cover them with a dab of wood filler if needed, but we just simply painted over them. Three coats covered them up pretty good. The pin nails will help hold the beadboard paneling in place until the Loctite construction adhesive sets up (which is around fifteen minutes according to the package). That was it for the install. As for the finishing touches, we simply painted it as we were painting our cabinets with The Rust-Oleum Cabinet Transformation base coat, which you will see in our Kitchen Paint post. {Coming Soon!!!}
The seams where the beadboard paneling met the edge of the cabinets were pretty small, but just to clean it up a bit, I taped off the lines with painters tape and used white caulking to fill in the gaps. By taping off the area you are caulking, you can get a good clean bead of caulking without getting it everywhere. That was it for the bead board! It went up without any hassle and we are very well pleased with the way it turned out.
Have you installed beadboard in your kitchen or another room? Or added something custom to your kitchen that helped it not appear so builder grade? Any other kitchen tips or tricks to share with our readers?
Putting up the beadboard wasn’t too difficult either (we TRY not to get ourselves in over our heads). I used some Loctite construction adhesive and secured it in place with my handy dandy pin nailer, which is great for finishing work, as the tiny pins barely even leave a hole where you put them. You can even cover them with a dab of wood filler if needed, but we just simply painted over them. Three coats covered them up pretty good. The pin nails will help hold the beadboard paneling in place until the Loctite construction adhesive sets up (which is around fifteen minutes according to the package). That was it for the install. As for the finishing touches, we simply painted it as we were painting our cabinets with The Rust-Oleum Cabinet Transformation base coat, which you will see in our Kitchen Paint post. {Coming Soon!!!}
The seams where the beadboard paneling met the edge of the cabinets were pretty small, but just to clean it up a bit, I taped off the lines with painters tape and used white caulking to fill in the gaps. By taping off the area you are caulking, you can get a good clean bead of caulking without getting it everywhere. That was it for the bead board! It went up without any hassle and we are very well pleased with the way it turned out.
Have you installed beadboard in your kitchen or another room? Or added something custom to your kitchen that helped it not appear so builder grade? Any other kitchen tips or tricks to share with our readers?
We purchased beadboard paneling that was primed and ready for paint. For us, the painting part consisted of using The Rust-Oleum Cabinet Transformation base coat so the final result would match up perfectly with our cabinets. I carefully measured the pieces we needed and cut them with a circular saw using a straight edge so I’d make sure to get a good straight cut. (If you have a table saw, that will work too!)
Putting up the beadboard wasn’t too difficult either (we TRY not to get ourselves in over our heads). I used some Loctite construction adhesive and secured it in place with my handy dandy pin nailer, which is great for finishing work, as the tiny pins barely even leave a hole where you put them. You can even cover them with a dab of wood filler if needed, but we just simply painted over them. Three coats covered them up pretty good. The pin nails will help hold the beadboard paneling in place until the Loctite construction adhesive sets up (which is around fifteen minutes according to the package). That was it for the install. As for the finishing touches, we simply painted it as we were painting our cabinets with The Rust-Oleum Cabinet Transformation base coat, which you will see in our Kitchen Paint post. {Coming Soon!!!}
The seams where the beadboard paneling met the edge of the cabinets were pretty small, but just to clean it up a bit, I taped off the lines with painters tape and used white caulking to fill in the gaps. By taping off the area you are caulking, you can get a good clean bead of caulking without getting it everywhere. That was it for the bead board! It went up without any hassle and we are very well pleased with the way it turned out.
Have you installed beadboard in your kitchen or another room? Or added something custom to your kitchen that helped it not appear so builder grade? Any other kitchen tips or tricks to share with our readers? 


[…] Beadboard […]
Whoa. Now I gotta try this beadboarding.