After living here for two years, we finally decided what improvements we wanted to do to our kitchen: Paint out cabinets white to match our white appliances and then paint our counters too!
“Going Green” is a good thing these days, but our kitchen had just a little too much green! With green countertops AND green linoleum, we felt like we needed to use a lawnmower in there instead of a broom. So let’s discuss our kitchen cabinet transformation, which is phase one in our kitchen makeover.
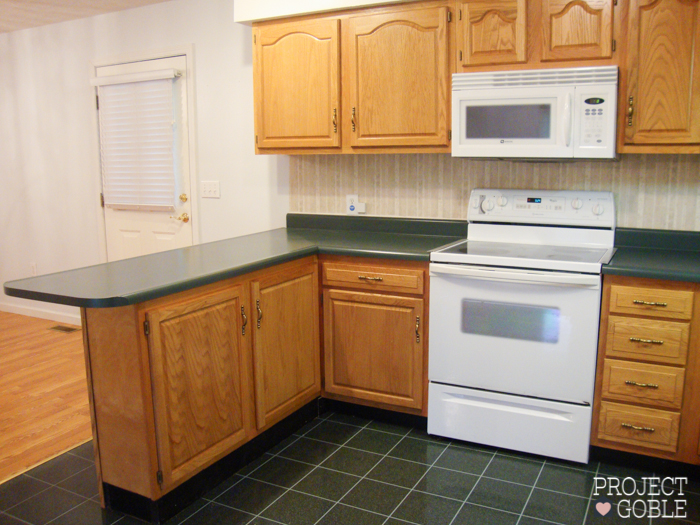
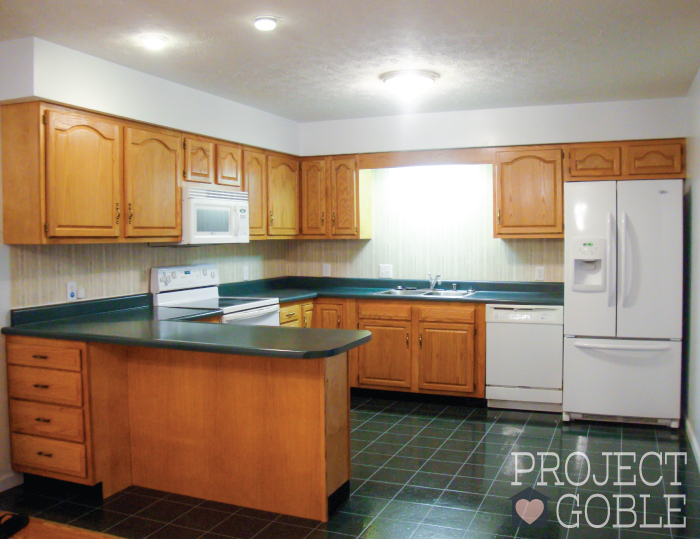 Our builder grade kitchen cabinets had a simple oak looking finish that felt a little dated to us. Since day one of looking at the house with our Realtor, we had been tossing around a few ideas about how we would really like our kitchen to look. Usually the kitchen is one of those selling points, but for us it was the potential we could see in the kitchen. After we purchased our house, we decided to not jump into anything too serious for the kitchen makeover right away, as we wanted to make sure whatever we did we would like for a (really, really, really) long time. Some of our ideas included sanding or using some kind of chemical stripper to remove the finish on the cabinets and then staining them a darker color. We also loved the idea of painting them white to brighten up the entire kitchen/dining room space.
 After brainstorming through all of our ideas, researching each option, and pinteresting different kitchens, we finally decided to “Go White” with all of our cabinets.
While on one of our many trips to Lowe’s, we came across a Cabinet Transformation Kit made by Rust-Oleum that had almost everything in it needed to refinish our kitchen cabinets. We did a little googling and had found MANY positive reviews and remarks on how easy the process was and the results were BEAUTIFUL! Obviously we don’t do this for a living (kudos to those who do!), nor had we ever painted kitchen cabinets before, so the easier, the better!
Although we hadn’t talked to anyone we knew who had used this exact product before, we did watch some YouTube videos that made us believe the Rust-Oleum Cabinet Transformation Kit just what we needed to refinish our kitchen cabinets. We really liked that the kit was available in different colors and included an optional decorative glaze that we could use to give the cabinets a wood grain looking finish.
If you decide to purchase this kit, make sure to have it tinted the color you want at the paint counter (or click the color option online) prior to checking out. We accidentally missed this step when we first purchased ours and had to return it (we were just too anxious to get started). We took the kit back to Lowe’s (with our receipt) and the fine folks in customer service allowed us to take it back to the paint desk and have one of their helpful employees tint it for us.
So what color did we pick? (Drum Roll please…..) PURE WHITE! That’s right, we decided to go with the all-white cabinet look over the dark stained idea. Since we have almost brand new white kitchen appliances the previous homeowners purchased, we won’t be upgrading to stainless anytime in the near future, so we figured we would help the white appliances blend in, as opposed to stand out.
The Rust-Oleum Cabinet Transformation Kit does include everything you need to get started, but we did have to purchase a few more items:
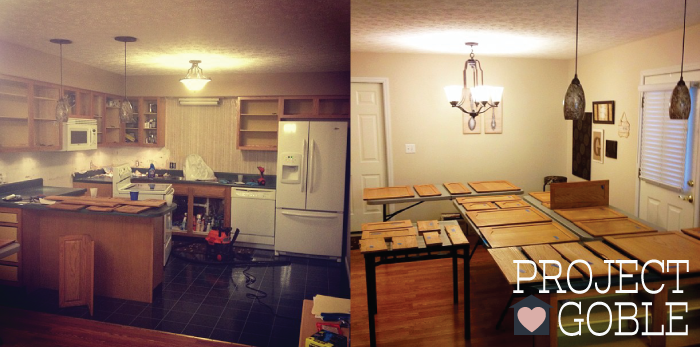 Something we found EXTREMELY helpful was the included instructional DVD. This walked us through each and every step. (Those very same videos can be viewed here)
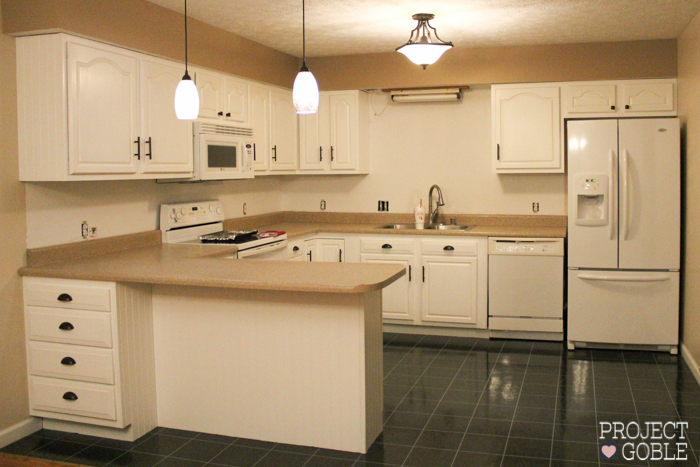
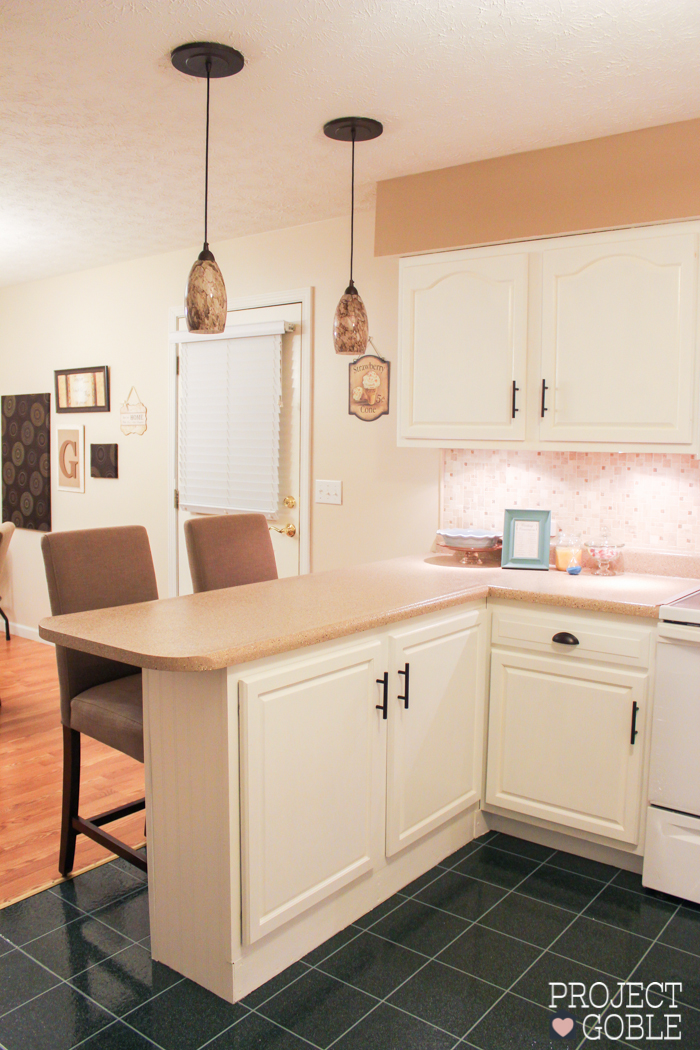
Here are a couple photos of some parts of our freshly painted white cabinets, prior to us painting our countertops using the Rust-Oleum Countertop Transformations Kit and before we added our backsplash.
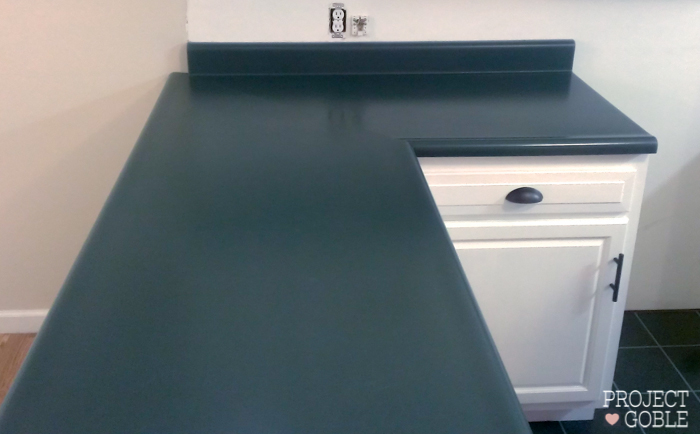
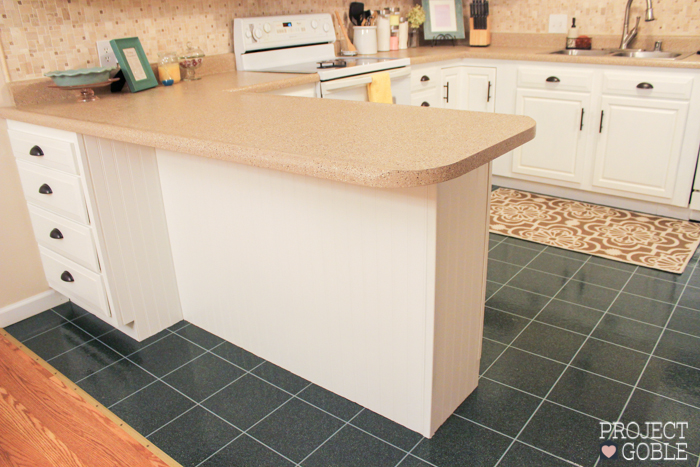
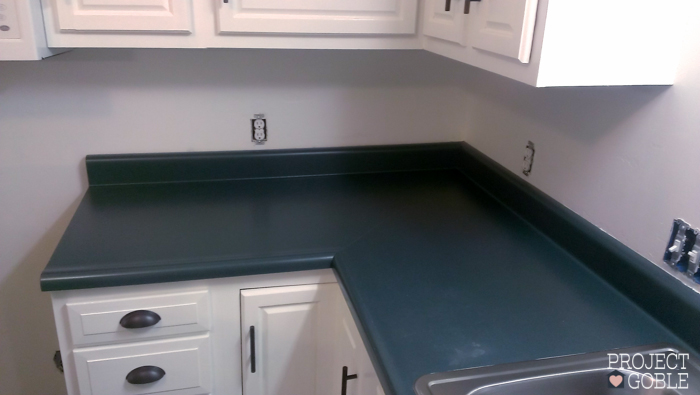 Then as you can tell, we painted the countertops.
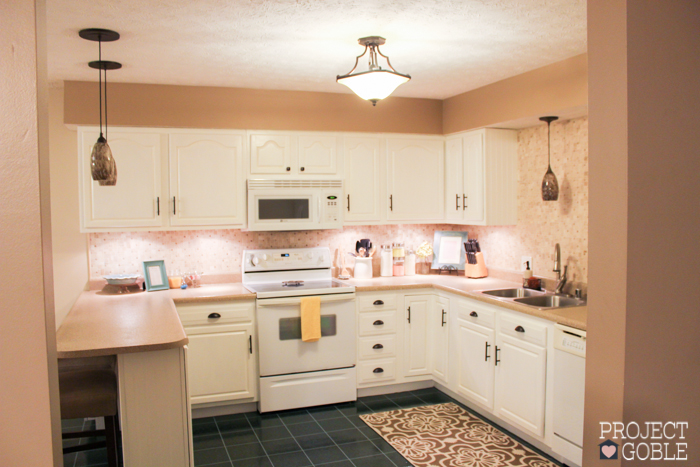
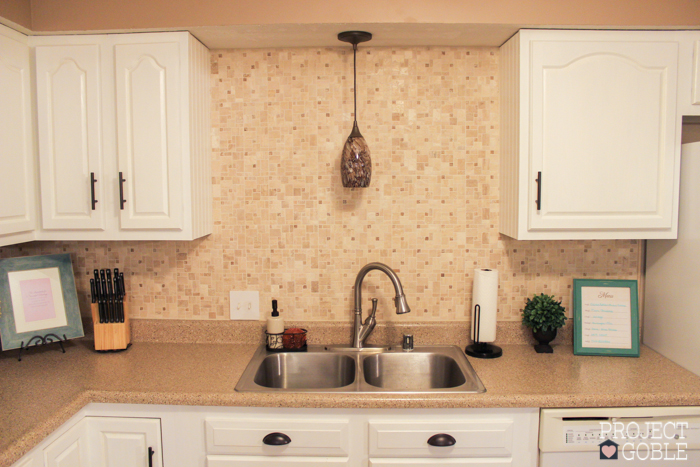
 And then added in a tile backspalsh. This is the completed space, which we absolutely LOVE!
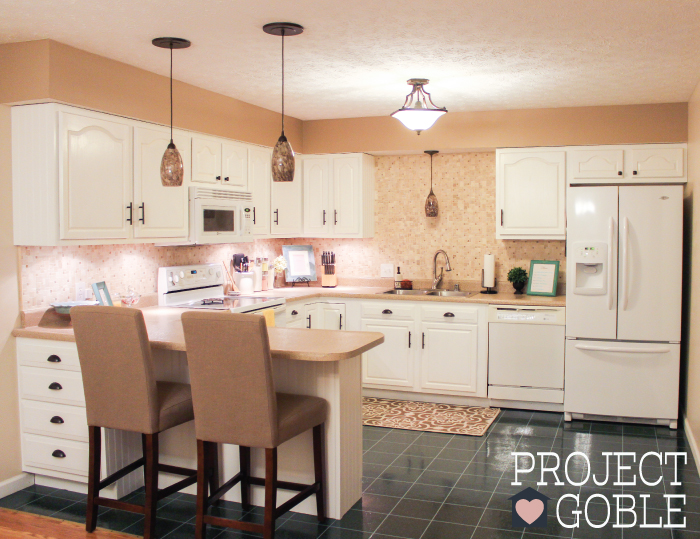

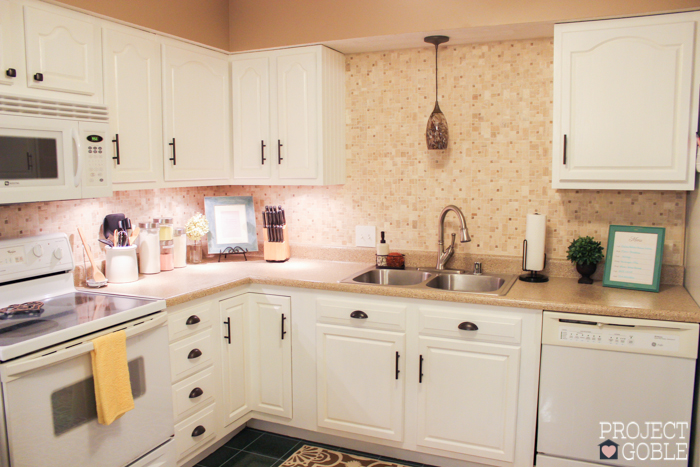
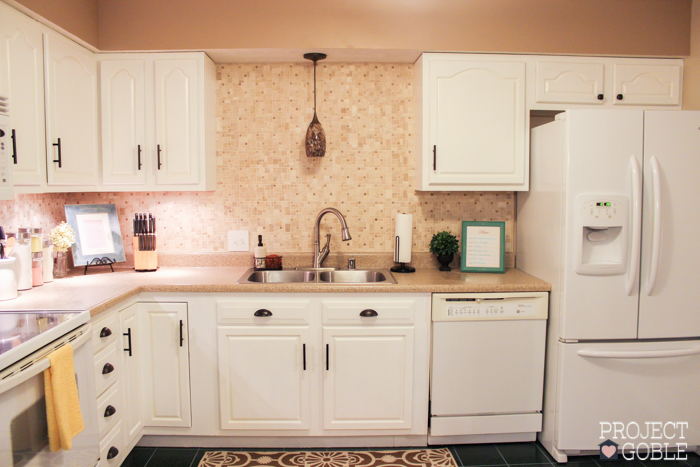
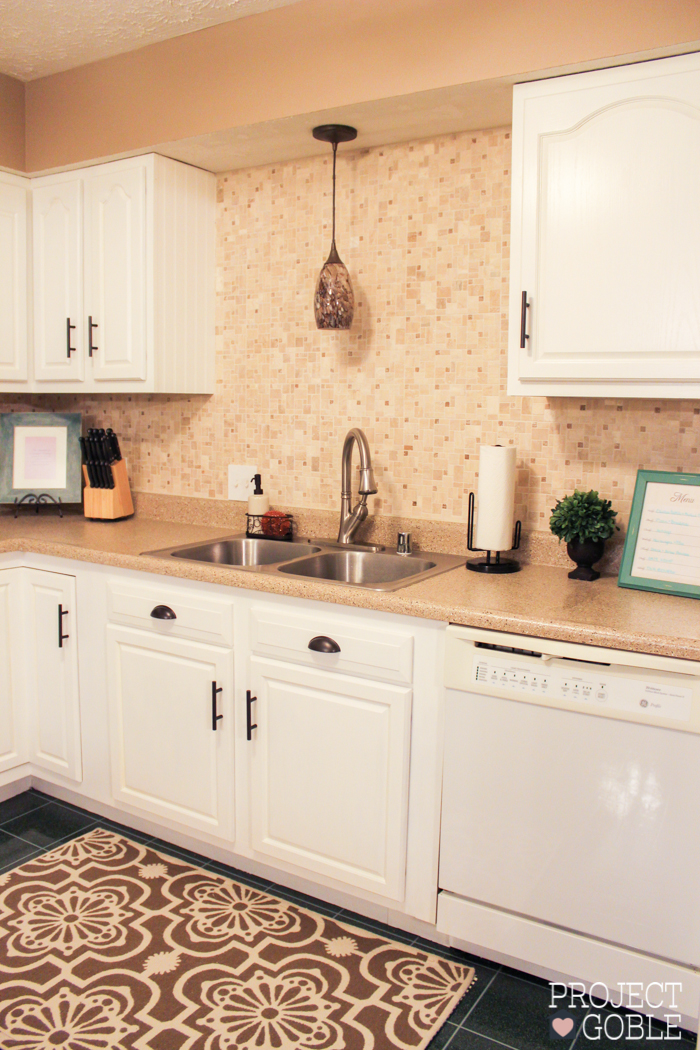 Overall, we are glad we chose to use the Rust-Oleum Cabinet Transformation Kit for our kitchen and are MORE than pleased with the final results. It definitely brightened up our kitchen area and made it a happier place. Allison even CLAIMS she may cook more now too! Although I’m not getting my hopes up on that, the entire process was totally worth all of our hard work, we enjoyed transforming our kitchen together, and are now sitting back and enjoying the completed room before moving onto our next project.
 Here is a breakdown of the other changes we have completed and a list of additional kitchen blog posts and sources from where we got everything!
UPDATES:
 Our builder grade kitchen cabinets had a simple oak looking finish that felt a little dated to us. Since day one of looking at the house with our Realtor, we had been tossing around a few ideas about how we would really like our kitchen to look. Usually the kitchen is one of those selling points, but for us it was the potential we could see in the kitchen. After we purchased our house, we decided to not jump into anything too serious for the kitchen makeover right away, as we wanted to make sure whatever we did we would like for a (really, really, really) long time. Some of our ideas included sanding or using some kind of chemical stripper to remove the finish on the cabinets and then staining them a darker color. We also loved the idea of painting them white to brighten up the entire kitchen/dining room space.
 After brainstorming through all of our ideas, researching each option, and pinteresting different kitchens, we finally decided to “Go White” with all of our cabinets.
While on one of our many trips to Lowe’s, we came across a Cabinet Transformation Kit made by Rust-Oleum that had almost everything in it needed to refinish our kitchen cabinets. We did a little googling and had found MANY positive reviews and remarks on how easy the process was and the results were BEAUTIFUL! Obviously we don’t do this for a living (kudos to those who do!), nor had we ever painted kitchen cabinets before, so the easier, the better!
Although we hadn’t talked to anyone we knew who had used this exact product before, we did watch some YouTube videos that made us believe the Rust-Oleum Cabinet Transformation Kit just what we needed to refinish our kitchen cabinets. We really liked that the kit was available in different colors and included an optional decorative glaze that we could use to give the cabinets a wood grain looking finish.
If you decide to purchase this kit, make sure to have it tinted the color you want at the paint counter (or click the color option online) prior to checking out. We accidentally missed this step when we first purchased ours and had to return it (we were just too anxious to get started). We took the kit back to Lowe’s (with our receipt) and the fine folks in customer service allowed us to take it back to the paint desk and have one of their helpful employees tint it for us.
So what color did we pick? (Drum Roll please…..) PURE WHITE! That’s right, we decided to go with the all-white cabinet look over the dark stained idea. Since we have almost brand new white kitchen appliances the previous homeowners purchased, we won’t be upgrading to stainless anytime in the near future, so we figured we would help the white appliances blend in, as opposed to stand out.
The Rust-Oleum Cabinet Transformation Kit does include everything you need to get started, but we did have to purchase a few more items:
- 2” Synthetic paint brushes
- 2” Foam brush
- 2” Painters tape
- Disposable containers
- Disposable gloves
- Lint free rags
- Elbow Grease (Cannot be purchased, you have to supply this yourself!!!)
 Something we found EXTREMELY helpful was the included instructional DVD. This walked us through each and every step. (Those very same videos can be viewed here)
Here are a couple photos of some parts of our freshly painted white cabinets, prior to us painting our countertops using the Rust-Oleum Countertop Transformations Kit and before we added our backsplash.
 Then as you can tell, we painted the countertops.
 And then added in a tile backspalsh. This is the completed space, which we absolutely LOVE!


 Overall, we are glad we chose to use the Rust-Oleum Cabinet Transformation Kit for our kitchen and are MORE than pleased with the final results. It definitely brightened up our kitchen area and made it a happier place. Allison even CLAIMS she may cook more now too! Although I’m not getting my hopes up on that, the entire process was totally worth all of our hard work, we enjoyed transforming our kitchen together, and are now sitting back and enjoying the completed room before moving onto our next project.
{ Below is a photo recap of the different phases and an updated photo of how our kitchen looks almost three years later! We still LOVE it! }
 Here is a breakdown of the other changes we have completed and a list of additional kitchen blog posts and sources from where we got everything!
UPDATES:
- Painted Kitchen
- Installed Mosaic Tile Backsplash
- Painted Oak Cabinets White using the RUST-OLEUM Cabinet Transformations Kit (Light Tint / Large Kit) / “Small” Kit
- Changed Cabinet Hardware to Cosmas Oil Rubbed Bronze Handle Pulls & Cosmas Oil Rubbed Bronze Euro Style Bar Handle Pull
- Changed Cabinet Hinges to ones that are “no-show”
- Painted Countertops using Rust-Oleum Countertop Transformations Kit, Desert Sand (Large Kit) / “Small” Kit
- Installed Beadboard on Bar Area & Sides of Cabinets
- Purchased Counter-Height Bar Stools: Home Decorators Collection’s Brexley Parson Counter Stool (with Chestnut Legs)
- Updated Flush Mount Light with Modern Light to Match Chandelier in Dining Room
- Replaced Two Recessed Lights with Pendant Lights
- Updated Light Switch Plates (no visible screws!)
- Installed Under Cabinet Lighting
- Updated Floor Vents
- Installed a Moen Brantford One-Handle Pulldown Kitchen Faucet in Brushed Nickle
- Designed Custom Kitchen Artwork (by yours truly, available for purchase in the Allison LeAnn Design Etsy Shop!)
- Buy a New Dishwasher
- Install Wireless Under Cabinet Lighting
- Install Crown Molding
- Purchase & Install Hardwood Flooring (Dark Wood Color)
I love white kitchens, they are so classic!
Lauren,
http://atouchofsoutherngrace.blogspot.com/
Thanks Lauren! We were well pleased with all the white, and can’t wait to add some contrast with a dark hardwood floor!
Wow – I can’t believe you did this with a kit. At first I scrolled to the bottom without reading and thought you bought all new, then I searched for the price – only to find you did this yourself – incredible. We are thinking about refinishing the garage into a den – hope it turns out as good as your kitchen. Great job.
-Buffi
My Wonderfully Dysfunctional Blog
Thanks Buffi! We did put in a bunch of elbow grease, but everything else was in a kit!
Hope your garage project turns out well! We will watch for the updates. Best of luck!
-Allison & Jay
Wow! You did a great job! I want to paint our cabinets white. We also have green countertops.. yuck! Did you also do your countertops yourself? I have seen a kit to paint those yourself also. I am going to start following you, I can’t wait to see more of your DIY projects! P.S. what part of ky do you live in? I currently live in Cinci but I live just over the river in KY for awhile.
Thanks Sara! We painted the cabinets AND the countertops! If I had to pick either of those to do again, it would definitely be the countertops, it was SUPER easy! And for the price, it totally beats replacing counters that are in good shape. It made a world of difference! {We are in the process of writing a post about the countertops too!}
We currently live in the Northeastern part of Kentucky. We were just in Cinci at Kings Island, IKEA (LOVE that place!), and Bass Pro Shop.
WOW I am majorly impressed with your update!!!
cantbuymelovvve.blogspot.com
Thanks Angi! It was totally worth the time and effort we put into it! We LOVE our kitchen now and hope others consider this affordable way of transforming theirs too!
Thanks Angi! Glad to see another Kentucky blogger! (Although we are still just getting started!)
[…] material very soon so it will match our new kitchen (you can read more about our kitchen redo here) and will also post photos once it is […]
I love it. You guys did a fantastic job. The after looks so modern.
Thanks Msjbelle! It was a lot of work, but well worth it!
Houzz just highlighted an all white kitchen and it looked clean and refreshing. Your before and after is a definite improvement. Updates and lightens. Great idea,
Thanks for the comment Chad! Glad you like our white kitchen. 🙂
It looks as though you also painting your countertops. Rust-Oleum also makes a countertop kit as well and I saw another blog post about that specifically. The user’s results for that project were less than acceptable. They had a lot of problems with the countertop application. It is not impervious to knives and other sharp objects. he cabinet kits may work very well, but the countertop kits, not so much.
Hello Judy! We actually DID use Rust-Oleum’s Countertop Transformation Kit on our counters! We have LOVED the results. Our countertops were in great shape, just not the prettiest. We didn’t want to fork out the money to replace them just because they were ugly. The cost of the transformation kit was well worth the little effort. It’s actually my favorite part of the kitchen and made the biggest transformation. We didn’t really have any problems with it after we learned what to do and it’s held up great ever since! Obviously it isn’t as great as a granite or similar material, but we would HIGHLY recommend it to someone looking for a quick and affordable fix.
I’m really liking the white cabinets with white appliances, which I have. I also have the ugly, builder grade cabinets (gross)….so I’m going to start painting. I like the color of your walls, it looks great with the white….can I ask what brand and color that is??
Thanks Andrea! We love our white cabinets, they really brighten up the kitchen. As for the wall paint on the soffit area above the cabinets, it is Valspar Signature Colors Interior paint in Faint Maple with an eggshell finish. The rest of the walls in the kitchen are Valspar Ultra Premium Interior paint in Desert Fortress with a satin finish. Be on the look out soon for a post about our kitchen backsplash.
I would want to turn my kitchen into Inspiration #2. So cozy and nice.
[…] the Rust-Oleum Cabinet and Countertop Transformation Products. We already have a post about our Rust-Oleum Cabinet Transformation. In this post here we are going to talk about why we chose it and how we applied […]
I also see that you put bead board up. Did you use the wallpaper bead board, or the real stuff? How durable is that on the island?
Hey Maureen. We used a bead board paneling as seen in this post here. So far it is holding up really well. We sit at the island more than our kitchen table so it has got plenty of use. Let us know if you have any other questions.
The transformation is beautiful! I was wondering how the countertops are holding up since repainting them.
Thanks Michelle! The countertops are actually holding up really well! They are pretty much the same as when we finished them. No signs of wear and tear. Out of painting the cabinets, painting the countertops, and installing the peel and stick backsplash, the countertop project was our favorite! It didn’t cost a lot, wasn’t very hard (although it was the messiest!), and made a huge difference in the overall look of the kitchen. If you didn’t know they were painted, you would never think a thing about them once being hunter green. We would highly recommend the countertop transformation kit! Hope that helps.
Can you see brush strokes where you painted the cabinets?
Nope. We applied 3 thin coats allowing plenty of drying time in between and it smoothed out really well as it dried.
How did u change the hinges??? Love it!
Hey Cindy Thanks. To change the hinges we had to drill two holes into the cabinet door for the hinge to recess into. The drill bit can usually be found at your hardware store in the section where the hinges and handles are. Let us know if you have any more questions.
Wow! Incredible. I have been wondering if you could paint builder grade cabinets. You have not only painted the cabinets but the counter top as well. The kitchen looks great.
Thanks so much KT! It really changed up the look of our kitchen! Best of luck with your projects. Let us know if you have any questions.
Beautiful!! The cabinets look brand new. Did you use the decorative glaze (last step) on the cabinets? We did the Kona at my sons house and didn’t like the glaze so we used something different. I want to make sure it doesn’t change the pure white look.
Thanks!!
Thanks so much Deanna! We did not use the decorative glaze. We liked the look of the glaze, but we wanted more of the bright white and it would have dulled it a bit. It would probably be nice, but not what we wanted for our space. Kona is Allison’s FAVORITE! Best of luck with your project! Let us know if you have any other questions! – A&J
Your kitchen looks great! I am going to do the same but can’t decide between black or white cabinets. How well does the white hold up? I’m afraid of white cabinets getting dirty too quickly since I have three kids. I’ve read white sometimes turns yellow. Did you have that problem?
Thanks so much Carrie! We LOVE our white cabinets. The white has held up really well. They don’t really get very dirty at all. If they do get something on them, it’s usually pretty easy to wipe off. We have had a few spots on ours turn a bit yellow. It’s not really noticeable though. If we were to do it again, we would probably just do another coat of the primer, which they refer to as the base coat. Good luck with your kitchen cabinet update. Let us know if you have any questions that we can help with!
Thanks so much Jodi! We used the “PURE WHITE” color from Rust-Oleum’s Kitchen Transformation Kit. Hope that helps! Happy DIY-ing!
Thanks Heather! We debated on staining ours dark wood, but decided we hoped to have dark wood floors one day and didn’t want the room to be too dark. White cabinets, Dark cabinets, and fun bold colored ones are our favorites. Good luck with settling into your new home!
Thanks for the sweet comment Jennifer. We used a drill press to change our hinges to concealed hinges. It was a bit time consuming but was worth it in the end. A handy tip if you are considering concealed hinges is to make sure your cabinet doors are thick enough first!
If we had to do this again, we would consider using the Kreg Concealed Hinge Jig. These weren’t out when we did ours or we would have totally tried it out! You can check those out via our affiliate link here: http://amzn.to/2FPQYiR
Hope that helps. Let us know if you have any other questions.
Love your kitchen! We also have white appliances and want to paint our oak kitchen cabinets and bathroom vanity white. Just to confirm that the Rust-Oleum Light Tint will match my white appliances.